Readers have been wondering where they can try their hands at wycinanki, the art of Polish paper cutting featured in Tradition of Deceit. (Learn more about wycinanki here.)
If you live in Wisconsin, try contacting the Polish Center of Wisconsin, the Polish Heritage Club of Madison, or other local Polish heritage groups. (Similar groups in other parts of the country can probably also provide information.) I’ve taken several workshops with Kasia Drake-Hames.

Kasia (in the tan sweater) holds workshops and classes that are low-key and fun, most often in the Milwaukee area.

My very first wycinanki project. Yes, it is just like making snowflakes. I took a class on wycinanki Christmas cards at the Polish Center of Wisconsin.
If you can’t find a class, don’t despair. It’s easy (and inexpensive) to get started.

Materials needed: paper (I use origami paper), scissors, glue. Tweezers can be helpful for placing pieces, and Q-tips work well to spread glue.
I wanted to feature symmetrical flowers from central Poland’s Łowicz region in Tradition of Deceit, and I’ve learned a lot about this type of wycinanki on my own. Ornate flowers are made by layering different colors of paper.


After gluing, I put the flowers between sheets of waxed paper and press them under heavy books. This keeps the flowers from curling as the glue sets.
When you’re starting out, it’s easiest to use printed patterns. I’ve found posts at Papermatrix particularly helpful. I also picked up a couple of vintage books.

After you’ve used someone else’s patterns for practice, it’s pretty easy to start experimenting with your own. Google wycinanki, study examples, and see what appeals to you.
When I design my own flowers, I use graph paper to help keep the diminishing sizes in order.

Patterns show half of a flower layer. Fold the origami paper in half, place the pattern against the fold, and trace around the pattern. (Trace on the back side, so any pencil marks that remain after cutting don’t show.) Use the fold line to help you align each new layer right in the center of the one below.
I started small by making simple wycinanki cards.


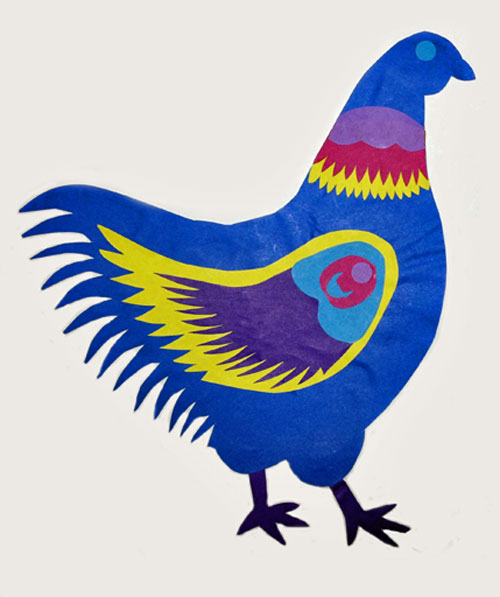
My big goal was to create a piece like one described in Tradition of Deceit, described as “Two very pretty chickens, flanking a bouquet of flowers, printed in vibrant colors.”
Roosters are very common, but I needed to create my own chicken pattern. I started by making a simple drawing, and then sketched in layers.

Then I transferred the layers to origami paper. You can see how some of the details evolved.
I wanted to have this piece finished before Tradition of Deceit was published. I wanted to have it finished before putting this post together. It’s still not complete…

In process!
That’s OK, though. I started with a very simple flower bouquet, but kept wanting to add more blossoms. Then I decided that the open space above and below the chickens needed to filled. The two flowers above the chickens haven’t been glued down yet because I’m still playing with ideas.
I’m sure more experienced paper cutters would have prepared a complete pattern layout before beginning. My piece has been growing more…shall we say…organically. (Hey, I don’t outline before beginning a novel, either.)
I’ve had a lot of fun with wycinanki, and if you’re so inclined, I hope you do to. And if you do try it, I’d love to see the results!
Tags: Kasia Drake-Hames, Polish Center of Wisconsin, Polish Heritage Club of Madison, Tradition of Deceit, wycinanki

June 30, 2015 at 10:13 pm |
Loved your Wycinanki work! You’re getting quite good. Would like to give it a try sometime. Such an interesting art form. Love how they use the various color papers and put them together. I lived in Elkhart , IN for 17 years and there was a lot of “Scherrenschnitte” done by the Amish but they mainly used black or dark blue paper to cut out their figures and things. they were lovely too. Interesting article and info from you. Enjoy how you give us updates with information about things from your books. So looking forward to your next Chloe book coming out! Hope you’re having a nice summer. Thanks Nancy
July 1, 2015 at 9:05 am |
Thanks for the kind comments, Nancy! I’ve been having fun with it. One of the nicest aspects of paper cutting is that it can be as simple or complicated as you wish. My father’s parents were born in Switzerland, and I have a couple of cuttings done by Swiss artists done with black design on a white background, as you describe the Scherrenschnitte. In parts of Poland the style is more monochromatic like that, but I fell in love with these vibrant and colorful images. So cheerful!
July 1, 2015 at 8:53 pm |
What a wonderful work of art, Kathleen! Thank you for sharing how you began working in the Wycinanki way. I hadn’t heard about this until reading this blog, but after looking at your pieces, I recognize the art. It much looks like the crewel work my German step-grandmother did on her pillow covers. I also have one of her square tablecloths with the same needlework work on it. Lots of flowers!
July 2, 2015 at 5:56 pm |
Alice, thanks! And how fun that it has echoes of your German step-grandmother’s work, just created with different materials. I can’t help imagining that people who painted/cut/embroidered/etc. such colorful flowers were much cheered by the designs. Thanks for sharing–and what a wonderful family heirloom you have!
August 6, 2018 at 4:24 am |
The graph paper ..is that where you create your pattern. I guess I’m confused as to how.you trace the pattern onto.your paper and how the graphing helps if your cutting the orgami paper
August 6, 2018 at 9:32 am |
Hi Jillian – I use the graph paper only to make sure that the layers of a single flower get progressively smaller. First I draw the rectangles (shown in the illustration) to get the sizes right. If I didn’t have the rectangles, I’d have a hard time keeping the flower layers in check.
Then I draw half of a flower, freehand, inside each rectangles. By keeping within the lines of the rectangle I know each flower layer will be the right size, and will fit well when layered together together. I try to have each layer fit totally within the next biggest layer so all the colors show.
I hope that’s helpful!